Export · 5 min read
Export: pixel-perfect slides, caption and zip in one folder
Choose the folder and format, export one or many slideshows, and send the files to your phone.
Export renders every slide with Google Chrome on your computer, exactly as the editor shows it, and writes the files into a folder you choose. Fyslide does not post for you; you upload from that folder.
1. Make sure Chrome is installed
Fyslide needs Google Chrome to render slides. If it is missing, a banner at the top of the app says so and links to Get Chrome.
2. Choose the export folder
Open Settings → Export. Export folder shows where slideshows go; click Choose… to change it. Left empty it is ~/Documents/Fyslide Exports.
3. Export from the editor
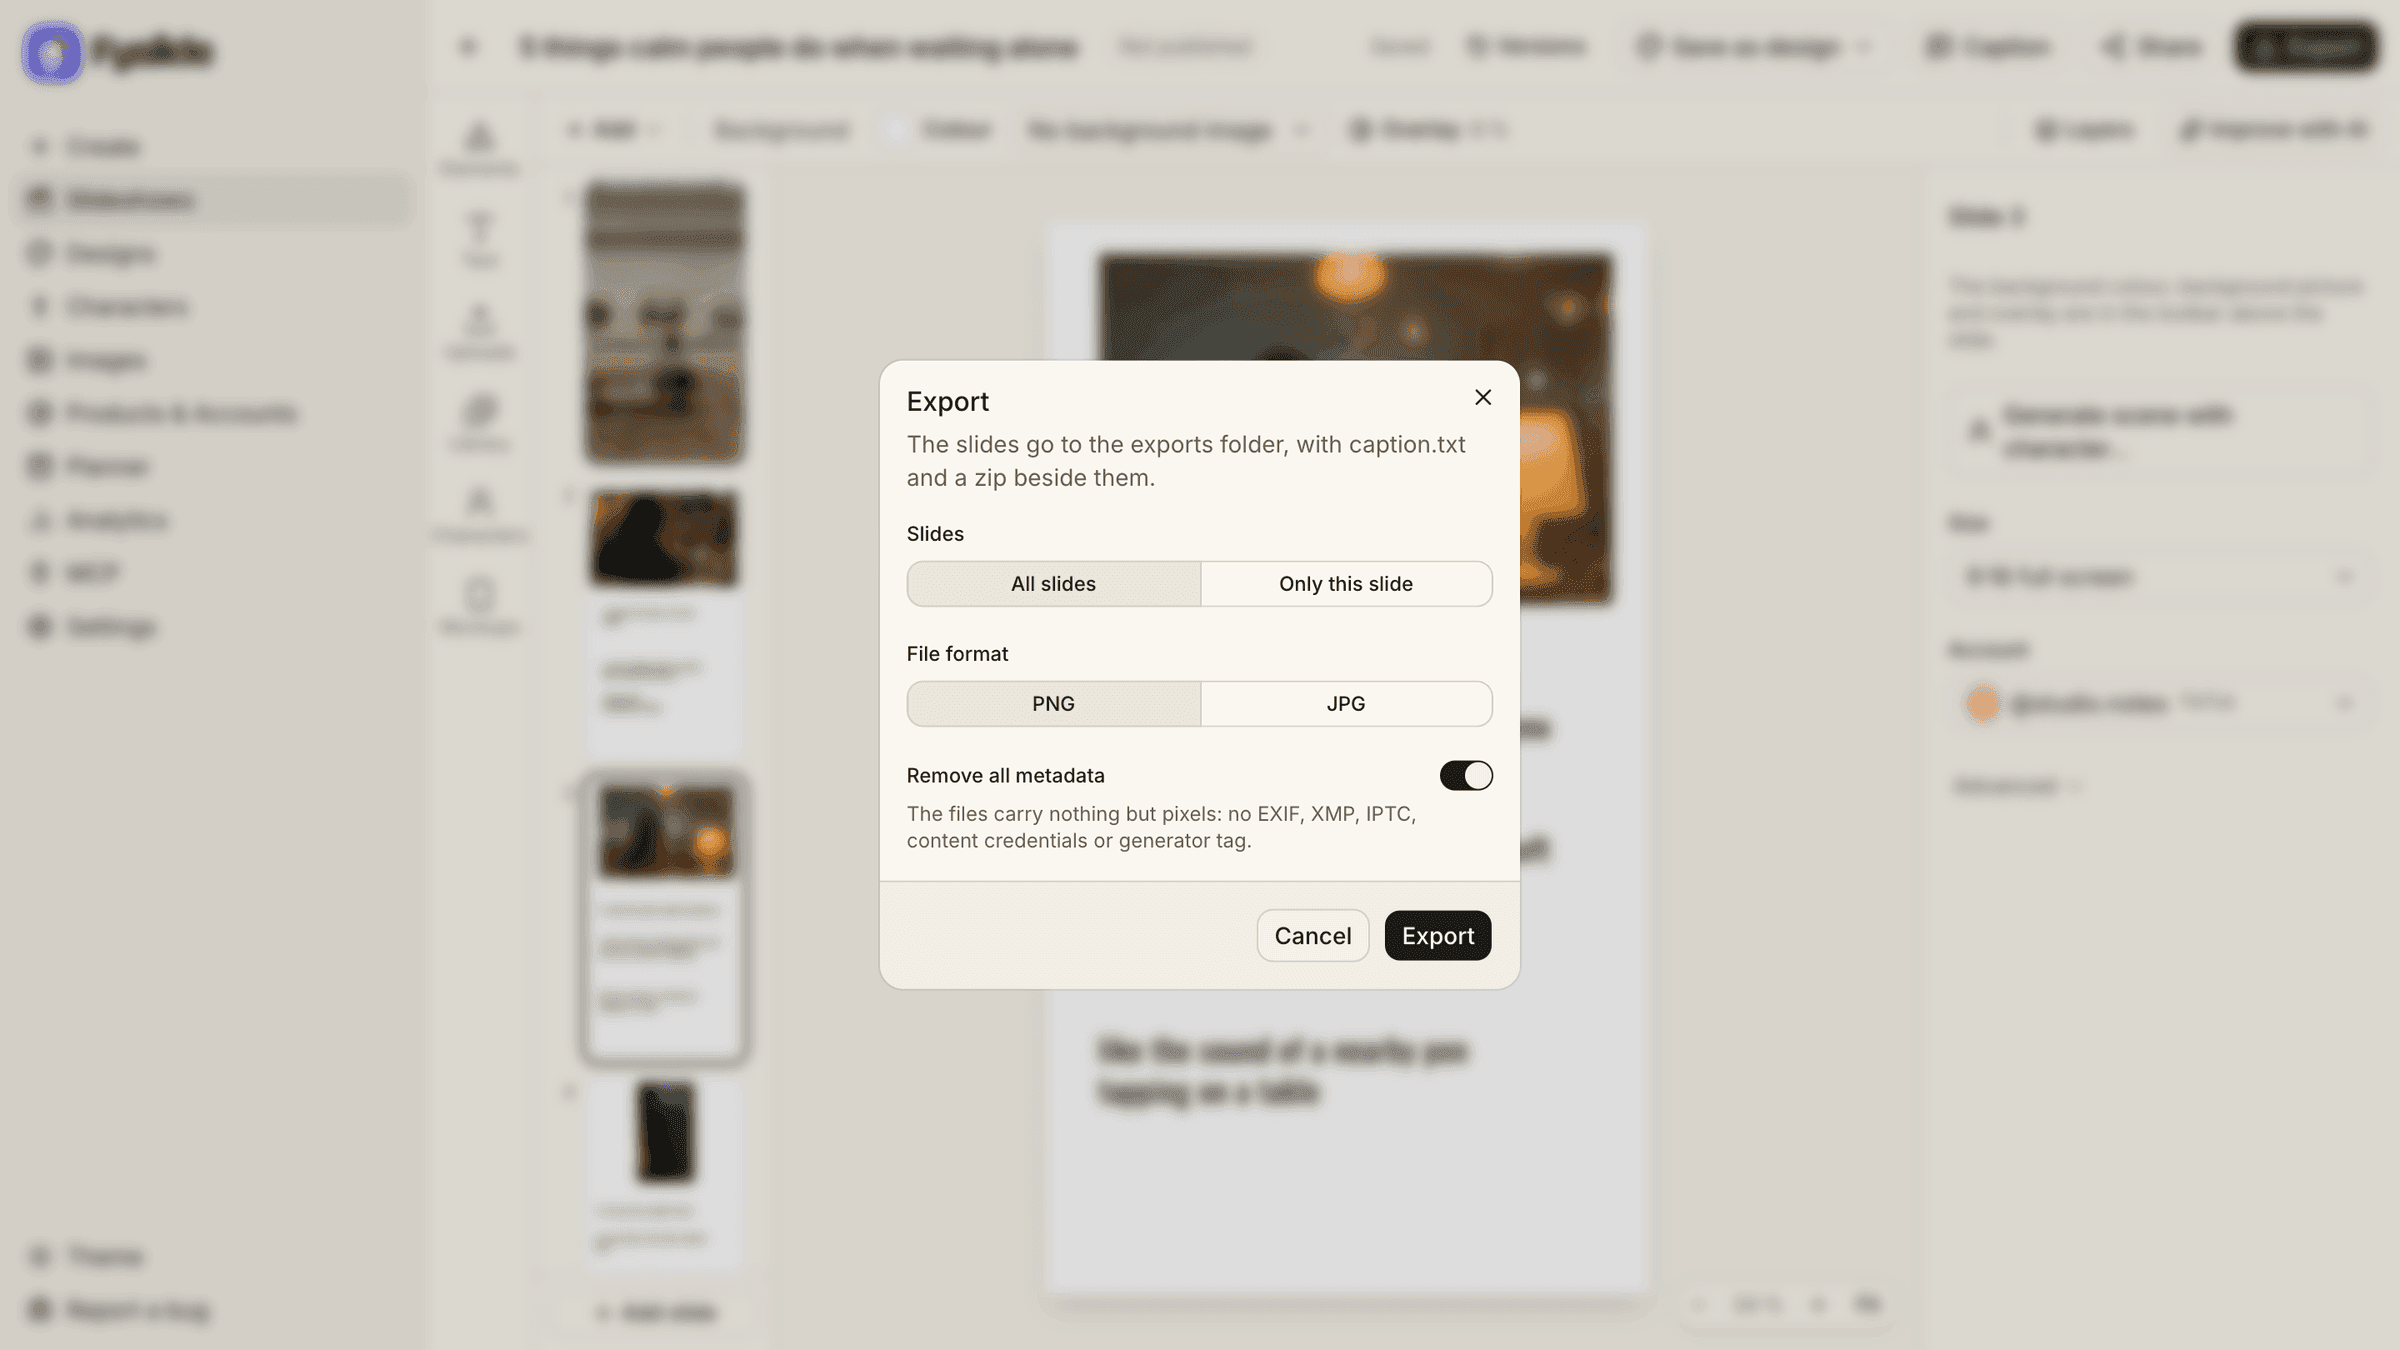
Click Export (⌘E) in the editor header. The dialog asks for Slides (All slides or Only this slide), File format (PNG or JPG) and Remove all metadata. Your choices are remembered for next time. Click Export; edits are saved first.
4. What you get
One folder per slideshow, named after the date and the topic, plus a zip beside it:
~/Documents/Fyslide Exports/
  2026-11-02_saving-money-in-your-20s/
    slide-01.png
    slide-02.png
    ...
    caption.txt
  2026-11-02_saving-money-in-your-20s.zip
The zip holds the slide images and caption.txt. Exporting only one slide writes a single file named after it, for example slide-05.png. A toast with Show in Finder opens the folder.
5. Export many at once
On the Slideshows page tick the corner check of several cards (Shift selects a range, Select all takes the whole list) and click Export in the selection bar. Each slideshow gets its own folder, several export at the same time and you can leave the page; a progress line (“Exporting 7 of 20 slideshows…”) and Show in Finder follow along.
6. Strip the metadata
Switch on Remove all metadata and the files carry nothing but pixels: no EXIF, XMP, IPTC, content credentials or generator tag. Switched off, PNGs are written exactly as rendered.
7. Check the caption
The text from the Caption button in the editor is saved as caption.txt next to the slides. Paste it into TikTok or Instagram with the images.
8. Send it to your phone
Share in the editor (or Share to AirDrop in a card menu) exports and then opens the macOS AirDrop panel with the files attached; pick your phone.
9. After you post
Use Link to post to connect the published post for Analytics.
Tips
- PNG is lossless; choose JPG for smaller files.
- Exports are local files: back them up like any other folder.