Editor · 8 min read
The slideshow editor: refine every slide
Edit text, pictures, shapes and slides, use AI to improve a selection, and restore earlier versions.
The AI gives you a first draft; the editor gives you control. What you see in the editor is exactly what you export.
1. Open a slideshow
Click Slideshows and then a card (or open a finished post from Create). Search the list, filter by published state or account, and use the card menu for Duplicate, Export, Share to AirDrop, Improve with AI, Link to post and Delete.
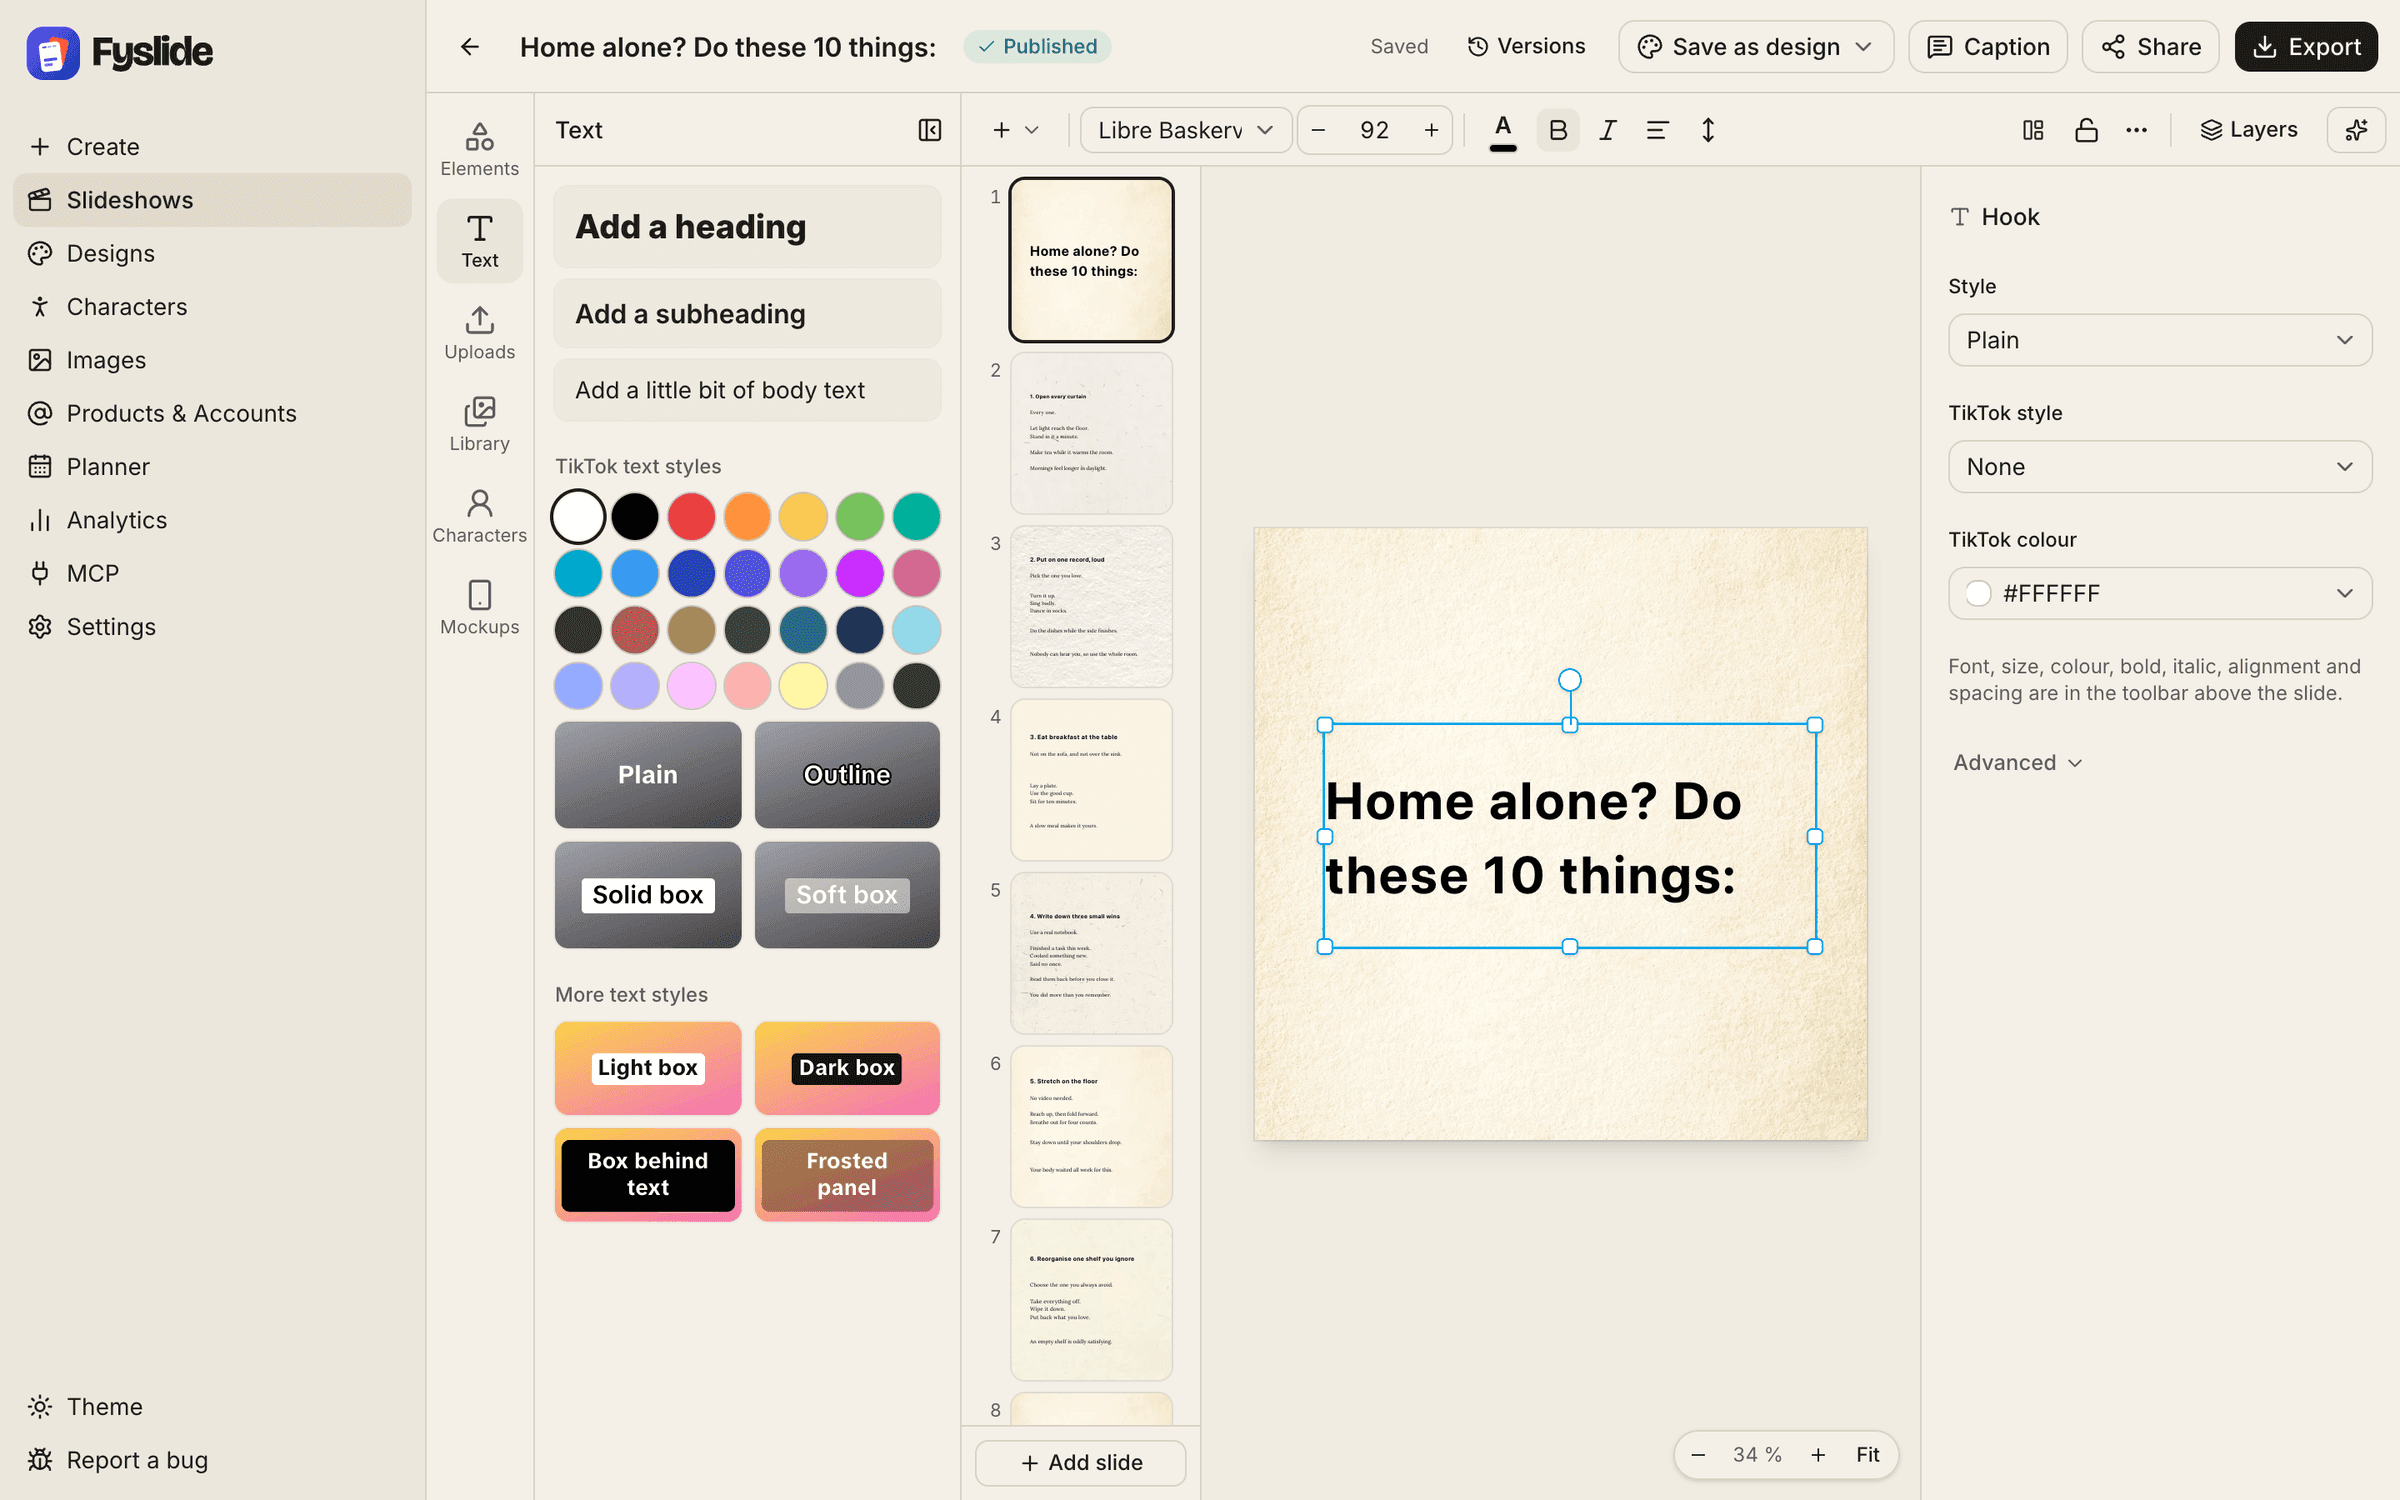
2. Know the layout
The header holds the title (click to rename), the saved status and the published switch, Versions, Save as design, Caption, Share and Export (⌘E). Left is the side panel (Elements, Text, Uploads, Library, Characters, Mockups), the toolbar follows your selection, the slide thumbnails sit beside the canvas, and the right panel shows Properties. Every change is saved automatically and can be undone with ⌘Z.
3. Edit text
Click a text once to select it, click again (or double-click) to type in place; Escape ends. Select words to give just those words a font, weight, bold, italic, underline, colour or size from the small toolbar; with nothing selected the main toolbar changes the whole text. The Text tab adds a heading, a subheading or a little bit of body text and offers TikTok text styles.
4. Work with pictures
Drag a picture from Uploads, Library or Characters onto a picture slot to fill it, or click it to add it. Drop a file from Finder onto the slide, or paste a picture copied elsewhere. With a picture selected, the toolbar has Replace, Crop, Flip, Filters and Remove background; the cut-out is shown first and applied only when you press Use. Mockups puts a phone on the slide; drop a screenshot onto its screen and it fits exactly.
5. Add elements
The Elements tab has shapes and lines, frames and grids (drop a picture onto a frame to fill it) and tints. Use ⌘D to duplicate, ⌘G to group, ⌘L to lock, the arrow keys to nudge, and ⌘+ / ⌘- / ⌘0 to zoom.
6. Manage slides
In the slide strip: Add slide, duplicate, delete, drag to reorder, and copy and paste whole slides between slideshows and designs (⌘C, ⌘V; Shift+click selects a range). A slideshow holds up to 100 slides. The first time you change a look or position Fyslide asks “Apply to this slide or all slides?”; text and pictures always stay on their slide.
7. Change the size
The Size select offers seven formats. Every element re-flows to the new size after a confirmation, and Undo brings the old size back.
8. Improve with AI
Click Improve with AI, choose what to act on (this text, this image, this slide, several slides or the whole slideshow), pick a quick choice (Punchier hook, Shorter, More concrete, In my tone, Brighter image) or type what you want. You see before and after side by side and decide Accept, Reject or Retry. Text runs on your chosen AI (a paid one asks first); new images cost money and show the count and price first.
9. Caption and versions
The Caption button holds the text you post with the slides, hashtags included, and writes caption.txt on export; Regenerate caption proposes a new one from the current slide texts. Accepting an AI change saves the version before it, so Versions lets you Restore any earlier state.
Tips
- Read every slide on its own: does slide 1 make people swipe, does the last one close the loop?
- Use Save as design once you have a layout you like.